[ Celery ] Asynchronous Task in Flask Using Celery (3/4)
本文為影片筆記,文中內容與影片不一定完全相同。
建立 Flask 官網提供,整合 Celery 和 Flask 的代碼:
整合 Celery 和 Flask:
啟動 Celery :


寫這章時只是順著播放列表看,但它的順序好像有點問題,所以先寫了這章後才有第二章。
因此自作主張的直接用 Redis 作為記錄器,還多執行了 Flower。所以一共執行了四個終端機,Redis、Celery、Flask 和 Flower。怕麻煩的話用 SQLite 應該是最輕鬆的。
到目前為止,已簡單地將 Celery 應用在 Flask 上了。
Asynchronous Tasks in Python - Getting Started With Celery (1/4)
Asynchronous Tasks in Python - Celery Backend Tutorial (2/4)
Asynchronous Task in Flask Using Celery (3/4)
Flask, Celery & SQLAlchemy Example (4/4)
建立 Flask 官網提供,整合 Celery 和 Flask 的代碼:
# flask_celery.py

from celery import Celery

def make_celery(app):
    celery = Celery(app.import_name, backend=app.config['CELERY_BACKEND'],
                    broker=app.config['CELERY_BROKER_URL'])
    celery.conf.update(app.config)
    TaskBase = celery.Task
    class ContextTask(TaskBase):
        abstract = True
        def __call__(self, *args, **kwargs):
            with app.app_context():
                return TaskBase.__call__(self, *args, **kwargs)
    celery.Task = ContextTask
    return celery
建立 Flask 後端:
# celery_example.py

from flask import Flask
from flask_celery import make_celery

app = Flask(__name__)
app.config['CELERY_BROKER_URL'] = 'redis://localhost:6379/0'  # 使用 Redis 緩存器
app.config['CELERY_BACKEND'] = 'redis://localhost:6379/0'  #  也使用 Redis 作為訊息記錄器

celery = make_celery(app)  # 建立 Flask app 的延伸

@app.route("/process/")
def process(name):
 return name

if __name__ == '__main__':
 app.run(debug=True)
Result Backend:工作完成後,紀錄狀態資訊和結果。
CELERY_BACKEND 也可選擇上一章 Asynchronous Tasks in Python - Celery Backend Tutorial (2/4) 提到的 SQLite 操作。
執行 Flask:CELERY_BACKEND 也可選擇上一章 Asynchronous Tasks in Python - Celery Backend Tutorial (2/4) 提到的 SQLite 操作。
$ python3 celery_example.py
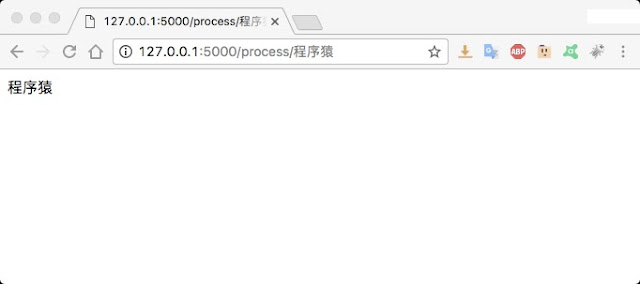
開啟瀏覽器,在網址欄輸入 “http://127.0.0.1:5000/process/程序猿”
瀏覽器中也將出現 ”程序猿“ 三個字
瀏覽器中也將出現 ”程序猿“ 三個字
# celery_example.py

...

@app.route('/process/')
def process(name):
 reverse.delay(name)
 return 'I sent an async request!'

@celery.task(name='celery_example.reverse')  # 明確指定 reverse 這個 function
def reverse(string):
 return string[::-1]
啟動 Celery :
$ celery -A celery_example.celery worker --loglevel=info
同樣在瀏覽器中輸入 “http://127.0.0.1:5000/process/程序猿”
瀏覽器中將出現 ”I sent an async request!“
瀏覽器中將出現 ”I sent an async request!“
執行 Celery 的終端機將顯示
[2017-05-12 03:11:47,551: INFO/MainProcess] Received task: celery_example.reverse[99f6ed20-34b7-4a32-9d44-84fba72fd221]
[2017-05-12 03:11:47,645: INFO/PoolWorker-1] Task celery_example.reverse[99f6ed20-34b7-4a32-9d44-84fba72fd221] succeeded in 0.08167692699998952s: '猿序程'
監控工具 Flower:
影片中使用的訊息記錄器,我沒有使用過,所以我就直接使用 Redis 作為訊息記錄器
要開啟 Redis 的訊息記錄器需要下載 flower。
要開啟 Redis 的訊息記錄器需要下載 flower。
$ pip3 install tornado == 4.2.0  # 安裝 Tronado, Flower 需求。版本不一定是 4.2.0
$ pip3 install flower == 0.9.1  # 使用 pip 安裝 flower
$ flower --port=5555 --broker=redis://localhost:6379/0  # 執行 flower
重新整理幾次 “http://127.0.0.1:5000/process/程序猿” 頁面,
在網址欄輸入 “http://localhost:5555/tasks”
就可以看到曾經執行的任務啦。
在網址欄輸入 “http://localhost:5555/tasks”
就可以看到曾經執行的任務啦。
寫這章時只是順著播放列表看,但它的順序好像有點問題,所以先寫了這章後才有第二章。
因此自作主張的直接用 Redis 作為記錄器,還多執行了 Flower。所以一共執行了四個終端機,Redis、Celery、Flask 和 Flower。怕麻煩的話用 SQLite 應該是最輕鬆的。
到目前為止,已簡單地將 Celery 應用在 Flask 上了。
Asynchronous Tasks in Python - Getting Started With Celery (1/4)
Asynchronous Tasks in Python - Celery Backend Tutorial (2/4)
Asynchronous Task in Flask Using Celery (3/4)
Flask, Celery & SQLAlchemy Example (4/4)
留言
張貼留言